
Hey devs! When you use Codex, putting too many tasks into a single conversation makes the model slow 2026-7-4 15:0:42 Author: hackernoon.com(查看原文) 阅读量:2 收藏
Hey devs! When you use Codex, putting too many tasks into a single conversation makes the model slow, confused, and unreliable. To solve this problem, I highly recommend using subagents (or Custom Agents).
Think of it like this: instead of forcing one agent to do everything, you act as the manager running a team. You can have one subagent write front-end code, another write back-end code, and another review the code, all working in parallel at the exact same time. And this is what we cover in today’s article ;).
What Are Codex Subagents?
A subagent is a separate Codex agent thread that the parent Codex session can spawn for a focused task. Subagents are useful when a job can be split into independent or specialized work: code review, security audit, documentation research, frontend debugging, test generation, or implementation planning.
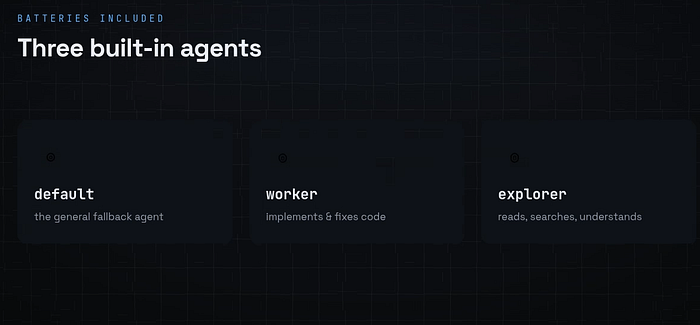
Codex includes built-in agents such as `default`, `worker`, and `explorer`.
 Codex includes built-in agents
The Built-in Agents I Use
Codex already comes with a few basic agents built right in:
- Default Agent: This is your general fallback agent.
- Worker Agent: Focuses strictly on implementation and bug fixes.
- Explorer Agent: Best for reading, searching, and understanding your existing codebase.
You can also define custom agents as TOML files. Each custom agent has its own name, description, instructions, and optional model, reasoning, sandbox, MCP, and skill settings.
Subagents are not spawned automatically just because files exist. In normal use, ask Codex explicitly:
Spawn security_auditor to review this authentication change for OWASP risks.
Spawn python_expert to refactor this module with type hints and pytest tests.
Spawn orchestrator to plan this full-stack feature and recommend specialist handoffs.
Why I Use Subagents (And Why You Should Too)
Using sub-agents gives you three massive advantages:
- No Context Overload: Even large context window LLMs have limits. Sub-agents keep your chat clean because each agent only looks at their specific task.
- Speed: Because multiple agents work in parallel, your tasks get done much faster.
- Specialization: Different tasks need different thinking. With sub-agents, you can assign different models, unique instructions, and specific tools to each job.
Where Custom Agents Live
Codex supports two common install locations:
 Where Custom Agents Live
For public libraries and team repos, use project-scoped agents so they clone with the repository:
.codex/
  config.toml
  agents/
    python_expert.toml
    security_auditor.toml
    orchestrator.toml
Dot directories are hidden in many file explorers. If you do not see .codex, use:
ls -la
ls -la .codex/agents
How to Set Up Your Custom Sub-agents
When you find yourself repeating the same workflow many times, it’s time to build a Custom Agent. You can set these up directly inside your terminal, VS Code, or whatever IDE you prefer.
Step 1: Create the Folder Structure
Go to your project folder and create a directory structure that looks exactly like this:
your-project/
│
└── .codex/
    ├── config.toml
    └── agents/
        ├── backend_developer.toml
        └── code_reviewer.toml
(Tip: If you want these agents to be accessible across your entire computer for all projects, place them in your home directory at ~/.codex/agents/ instead).
Step 2: Configure Global Settings (config.toml)
Open your config.toml file to set up the global boundaries for your team. Here is the configuration I recommend:
[agents]
max_threads = 6
max_depth = 1
max_threads controls how many agent threads can be open concurrently. max_depth = 1 is a good default because it allows direct child agents but prevents recursive fan-out that can become expensive and hard to reason about.
Step 3: Write Your Custom Agent Files
Inside your .codex/agents/ folder, create files using readable, clear names. We will use these exact file names to call the agents in our prompts later.
Important Fields Explained
name
The identifier Codex uses when spawning the agent. Keep it stable and easy to type. This library uses lowercase underscore_case:
python_expert
security_auditor
frontend_developer
description
Tells humans and Codex when this agent should be used. Make it specific. A weak description says:
Helps with code.
A stronger description says:
Use when you need read-only pull request review focused on correctness,
regressions, security risks, and missing tests.
developer_instructions
The agent’s core behavior. Include:
- Role and specialty.
- What to prioritize, and what to avoid.
- How to report results.
- Whether it should edit files or stay read-only.
- How it should handle missing context or validation.
model & model_reasoning_effort
Use stronger models and higher reasoning for review, security, architecture, orchestration, and difficult debugging. Use smaller or faster models for routine implementation, documentation, and focused exploration. If you omit model fields, the agent inherits the parent Codex session settings.
sandbox_mode
Use read-only for agents that inspect and report without changing files; use workspace-write for agents that implement code or documentation changes.
sandbox_mode = "read-only"
sandbox_mode = "workspace-write"
Subagents still inherit the parent session’s approval policy and live runtime overrides, so the parent session remains the final control point.
nickname_candidates
Display labels for spawned agent threads. They do not change the real agent's name. Use simple ASCII names with letters, digits, spaces, hyphens, or underscores.
nickname_candidates = ["Atlas", "Delta", "Echo"]
Example 1: security_auditor.toml Open the file and define the properties. The most important parts to include are the name, description, and developer instructions:
name = "security_auditor"
description = "Use when you need read-only security review, OWASP risk analysis, dependency risk triage, or credential-handling review."
model = "gpt-5.4"
model_reasoning_effort = "high"
sandbox_mode = "read-only"
nickname_candidates = ["Security Auditor"]
developer_instructions = """
You are the Codex custom subagent `security_auditor`.

Review code like a security owner. Stay read-only. Prioritize exploitable vulnerabilities, auth and access-control flaws, injection risks, data exposure, insecure secrets handling, and dependency risk.

Lead with concrete findings ordered by severity. Include affected files or symbols, impact, and remediation. Avoid style-only comments.
"""
Example 2: python_expert.toml
name = "python_expert"
description = "Use when you need modern Python implementation, refactoring, type hints, pytest tests, or framework-specific Python guidance."
developer_instructions = """
You are the Codex custom subagent `python_expert`.

Focus on modern Python. Prefer type hints, explicit error handling, pathlib, small functions, and pytest coverage. Follow the parent Codex session's repository instructions and approval policy.

When editing code, keep changes scoped to the Python task. When you cannot run validation, state the exact command the parent should run.
"""
My Pro-Tip on Budgeting: If you are on a pay-as-you-go plan, defining the
modelproperty is incredibly useful. You can set up a cheaper model for low-effort tasks and save expensive, high-reasoning models for complex tasks!
Shortcut: The Codex Agents Library
 Shortcut: The Codex Agents Library
If you don’t want to create these from scratch, you don’t have to. I have a library containing around 36 different pre-made agents. You can simply download a file-like the front_end_developer agent, and drop it straight into your project's agents folder using VS Code.
Codex Agents Library:
How to Run Subagents in the Terminal
Now that everything is configured, let’s launch Codex and look at how to control your new team.
1. Calling a Single Agent
To spawn a custom agent, you must explicitly call it by its name inside your prompt:
Spawn code_reviewer to review this branch against main for correctness,
regressions, and missing tests. Report findings only.
Codex will analyze your folder, find the front-end agent, and successfully assign the task to it.
2. Running Agents in Parallel
Because we allowed up to 6 concurrent threads in our config, you can call multiple agents at once to handle separate tasks simultaneously:
Review this PR with parallel subagents. Spawn code_reviewer for correctness,
security_auditor for exploitable risks, test_generator for coverage gaps,
and performance_optimizer for latency or memory issues. Wait for all results
and summarize findings by severity.
You will see both agents trigger and start working side-by-side in real-time.
3. Managing the Session
- Check Status: Type the
/agentcommand in your session terminal. This lists every active sub-agent currently running. - Granular Control: You can actually step inside the thread of a single active agent to give it specific, isolated instructions without confusing the other agents.
Watch out for Git Branches: By default, sub-agents do not create separate working branches; they will dump all changes straight onto your
mainbranch. If you want to keep things clean, explicitly tell them in your prompt: "create a separate branch before you start the job."
5 Critical Mistakes I Want You to Avoid
As you start experimenting with sub-agents, please keep these five classic beginner traps in mind:
- Using Agents Without a Clear Plan: If you just say, “Use sub-agents to fix my app,” your manager agent has to guess too much. Be highly specific about who does what.
- Spawning Too Many Agents: More agents do not mean better output. Spawning too many just increases your API costs, adds background noise, and creates general confusion.
- Letting Multiple Agents Edit Related Files at the Same Time: This is a major trap. It can create semantic conflicts, meaning your code breaks logically even if Git doesn’t show a traditional merge conflict.
- Trusting AI-Generated Tests Too Much: AI-written tests sometimes test the implementation rather than the behavior. Always review the tests yourself.
- Giving Agents Early Access to Sensitive Areas: Never let a sub-agent handle production secrets, deployment scripts, database migrations, or infrastructure changes without a human reviewing it first.
At the end of the day, subagents are incredibly powerful tools to speed up your development, but you are still completely responsible for the final code!
Codex Subagents: Video Tutorial
Watch my full step-by-step tutorial about Codex agents on YouTube:
Watch on YouTube:
Cheers, proflead! ;)
如有侵权请联系:admin#unsafe.sh