
Preamble
Anybody who has had a conversation with me about networks probably knows that I’m a bit of a MikroTik fanboy, and for good reason. I am also a long-time user and supporter of OpenWrt which makes my enthusiasm for MikroTik even more significant. Somewhere around 16 years ago I got my first router (TP-Link WR1043ND), my first introduction to OpenWrt, and my first USB-serial cable after accidentally flashing an update to the wrong place and bricking the router. I was amazed at how versatile the platform was, the fact that I could run arbitrary services on my router, limited only by its meagre resources.
For many years, any network I was in control of would run OpenWrt. Having to use any stock software on a router would make me cry, until I discovered MikroTik: a platform that somehow exposed so much control that, for the first time, OpenWrt didn’t seem like a necessity anymore. At first it was confusing (it’s not what I would call “intuitive”) but between affordable hardware, generous licensing and an insane list of features, it’s now at the core of my home network with practically no real limitations on how I want to run it. I highly suggest you play with one, and this post will give you one use case for exactly this.
One-click PITM
Intercepting mobile device communication can be a bit of a pain, but this technique will allow you, once configured, to toggle interception as you need it. One toggle switch and all traffic will be redirected to Burp. This post serves as a quick-and-dirty guide, and also an example of one of the many, many features built into MikroTik routers.
First, it is assumed that you have a MikroTik router which is connected to the Internet and is hosting its own wireless network in a typical router configuration. Your device under test should connect to this network and so should your laptop. By default, traffic will flow as it normally would, albeit with an additional NAT layer. For most applications, this won’t matter.
We need to configure Burp as a transparent proxy, this is done with a single checkbox. You can either adjust the existing proxy config or add a new one:
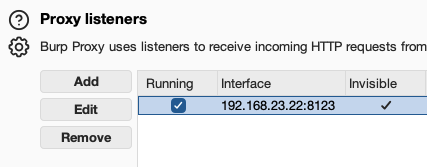

- The port can be anything
- The IP needs to be your LAN IP address
- The “invisible proxy” option needs to be enabled
Next, we’ll create some firewall rules on the router:
- Redirect all TCP traffic on ports 80 and 443 from the test device to your Burp listener
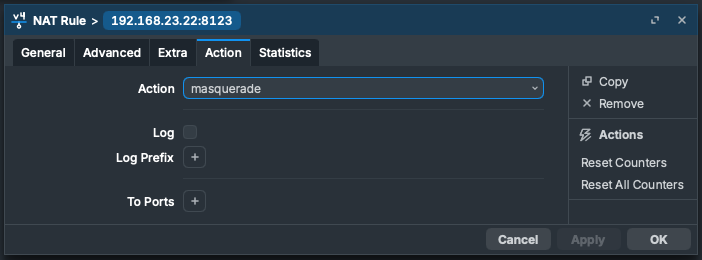
- Masquerade traffic destined to 8123 (so that the connections are tracked and responses go to the right place)
- Block IPv6 (if applicable, not covered here)
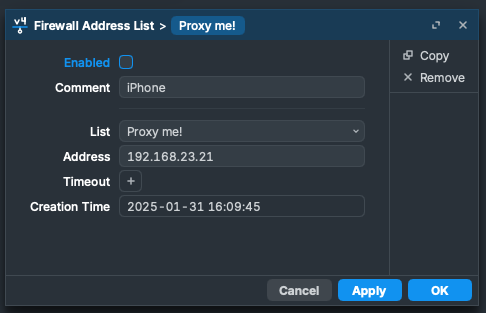
To enable “one-click” proxying, we’ll also create an address list to which device IPs can be added. Entries in this list can be enabled or disabled, which is how we’ll toggle proxying.
Add a new address list item (IP > Firewall > Address Lists > New)
Fill in the address, give the list a name and add a descriptive comment. Leave it disabled for now.
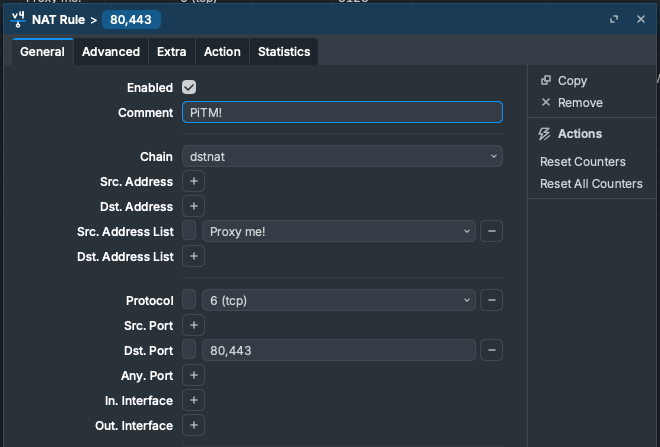
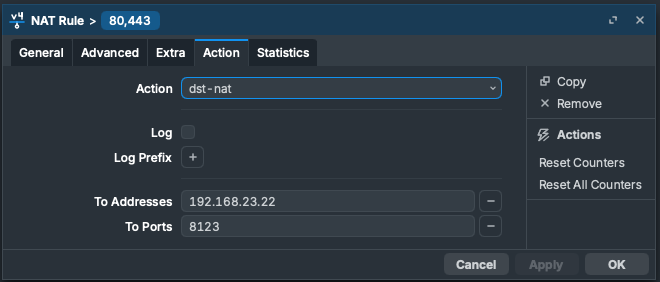
Create a new NAT rule (IP > Firewall > NAT > New):
- Chain: dstnat
- Src. Address List: Proxy me!
- Protocol: TCP
- Dst. Port: 80,443
- Action: dst-nat
- To Addresses: Your Burp host IP
- To Ports: Your Burp listener port
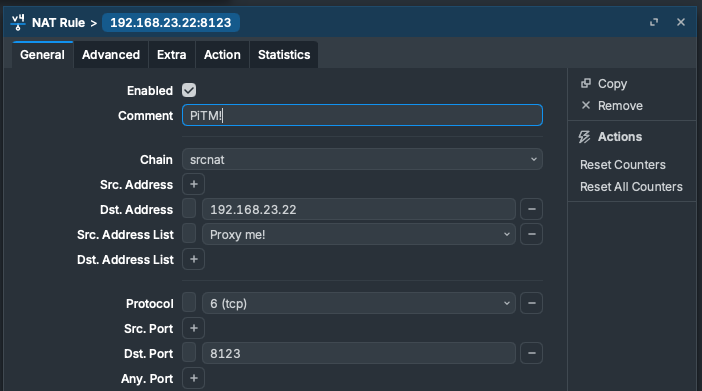
Add a second NAT rule to masquerade all traffic going to Burp:
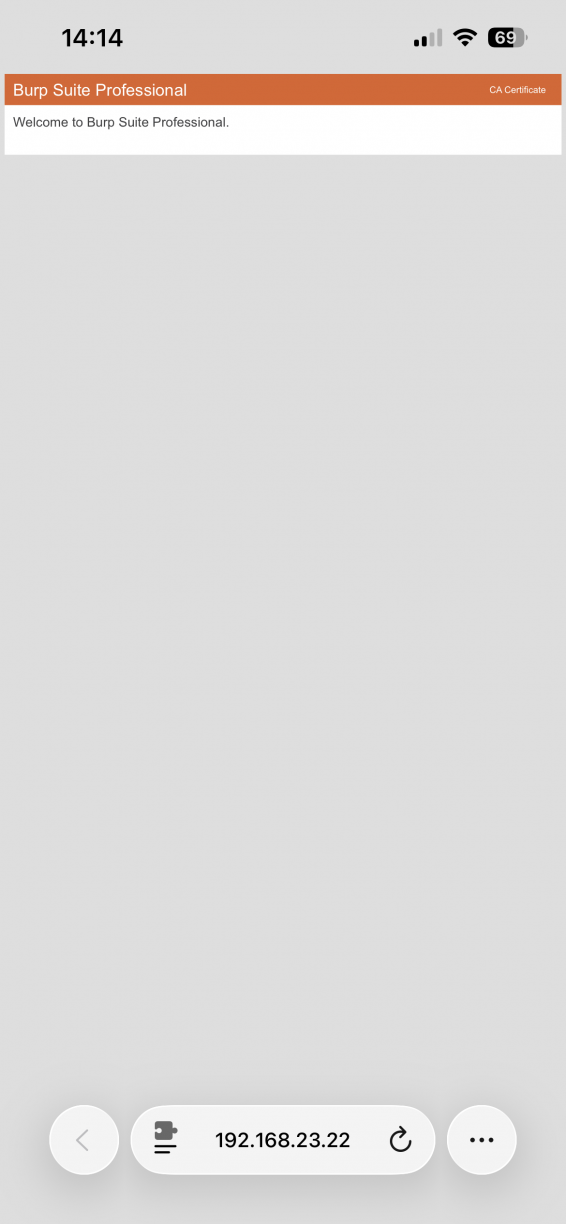
Now you should be able to access the Burp page in your browser to download the certificate. Follow the steps for your platform to configure the certificate, there’s a good chance this is already done.
Once configured, you should be able to enable the entry in the address list to enable proxying. Check a website and make sure traffic appears in Burp.
Advantages of this approach:
- Fully wireless
- No special config required on the device, so it applies to apps that are not proxy aware or sidestep the proxy
- Works with devices that don’t support proxy configurations at all (like IoT devices), provided they’re using insecure HTTP or don’t validate certs properly
- One click toggles proxying. Many MikroTik devices have a button and/or LED you can use to make the switch and see the status without needing to connect to the admin panel at all
- Will also proxy low-level OS communications which can be interesting
Got any of that… API?
Actually yes! RouterOS exposes a REST API through the same web server that hosts the browser-based configuration interface. For example, to enable/disable the “iPad” entry in your address list, you’ll first need the ID for that entry. You can do this with a GET request and filter on the comment (you should always add comments to entries – future you will be grateful):
ID=$(curl -s -u admin:yourpass \
  -X GET 'https://192.168.23.1/rest/ip/firewall/address-list' \
  -H 'Content-Type: application/json' \
  | jq -r '.[] | select(.comment == "iPad") | .[".id"]')
Then you can use the ID to change properties. For example, change “disabled” to false:
curl -k -u admin:yourpass \
  -X PATCH "https://192.168.23.1/rest/ip/firewall/address-list/$ID" \
  -H 'Content-Type: application/json' \
  --data '{ "disabled": "false" }'
And just like that, you’ve toggled an entry to be proxied. You can obviously do a whole lot more, this is just one example. There is documentation available on general API usage.
There are various cases where you might see an app communicating, you have a proxy configured but you don’t see the traffic. You might not be sure where the traffic is going. This approach removes that uncertainty because anything destined for ports 80 or 443 will pass through the proxy. You can also add additional firewall rules to block traffic on other ports, or run a packet capture scoped to the MAC address to see all the traffic without exception. But that’s for another post :)